How to Overlay Word Art on Top of Typing Google Doc
Apps similar Microsoft Word, Google Slides, etc., let y'all overlap images or text over another prototype without whatsoever fuss. But when users try to achieve the aforementioned in Google Docs, they are left disappointed. The capability to put an image or text in front of some other image is missing in Google Docs. That doesn't hateful it's not possible to attain layering of text over pictures. Y'all tin can exercise it with the methods mentioned in this post.
Layering in Docs can add together words to a pic, add a logo or watermarks to an image, or merge 2 images. In that location are 2 means to layer images in Google Docs. Firstly, with the help of Google Drawings and secondly, using the wrap text characteristic.
Let's cheque both the methods to layer images or text on another picture in Google Docs.
Method 1: Overlap Images in Google Docs With Google Drawings
In this method, yous demand to add your image every bit a drawing first. Then you can add images and text over the same image. Here are the steps in particular.
Stride 1: Open your Google Docs certificate.
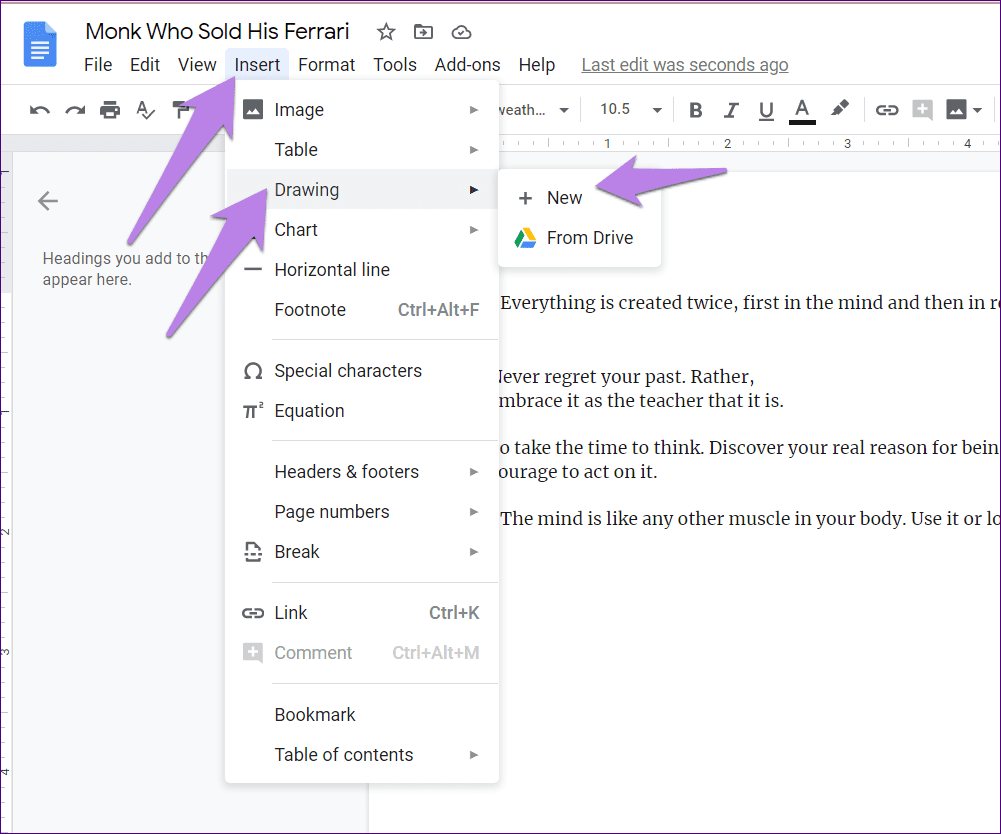
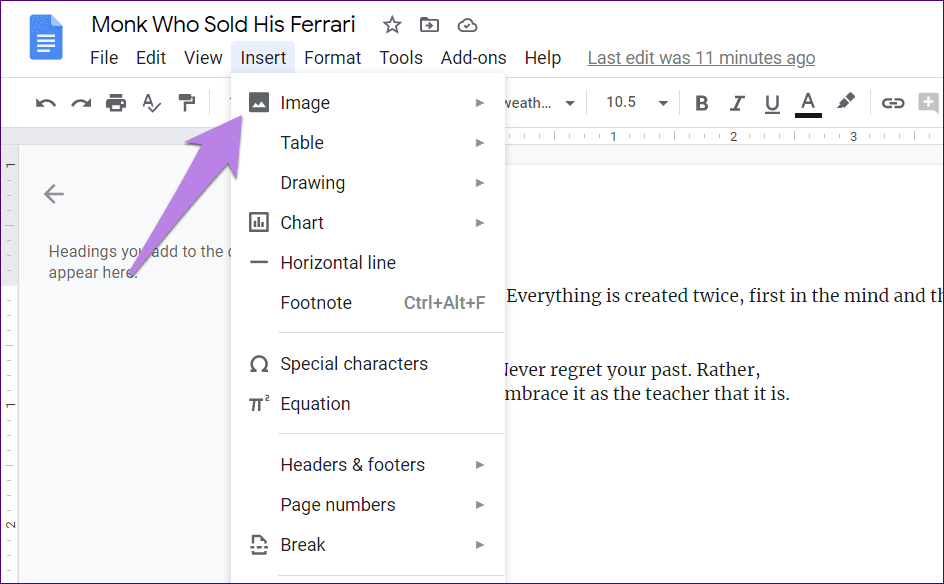
Stride two: Click on Insert at the height and Choose Cartoon > New.
Pace 3: You will be taken to the built-in Google Cartoon module. Click on the Image icon to add your background image.

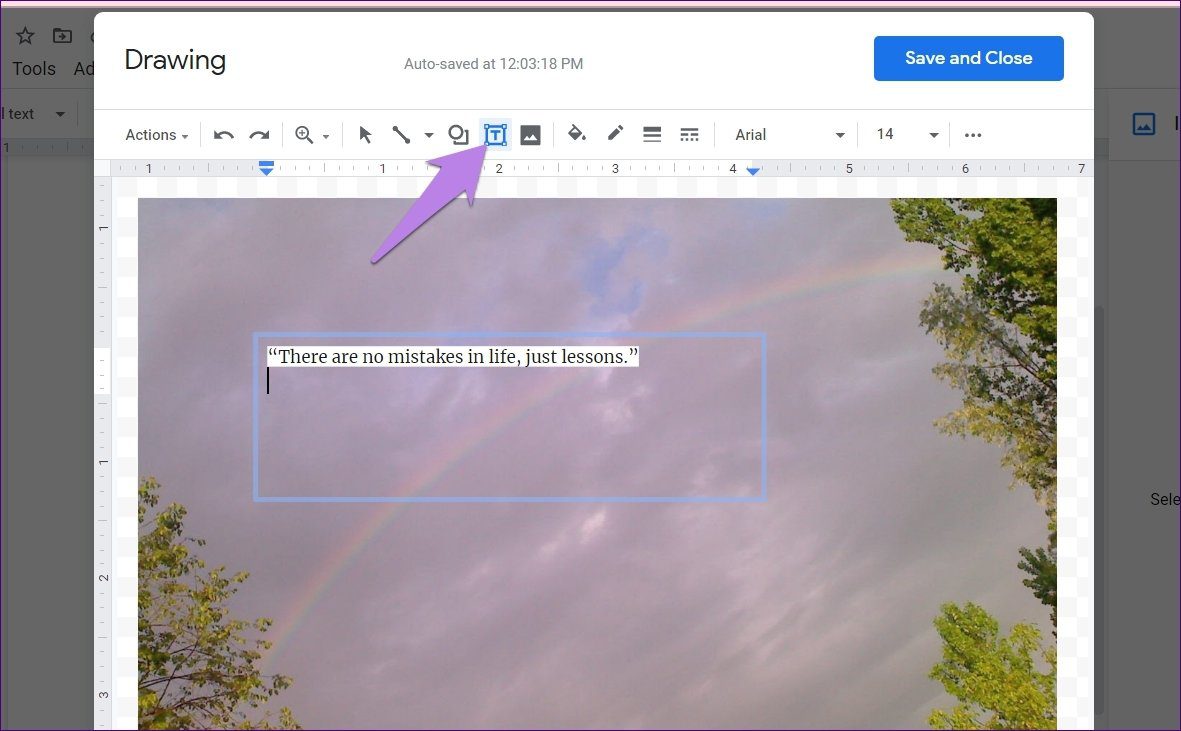
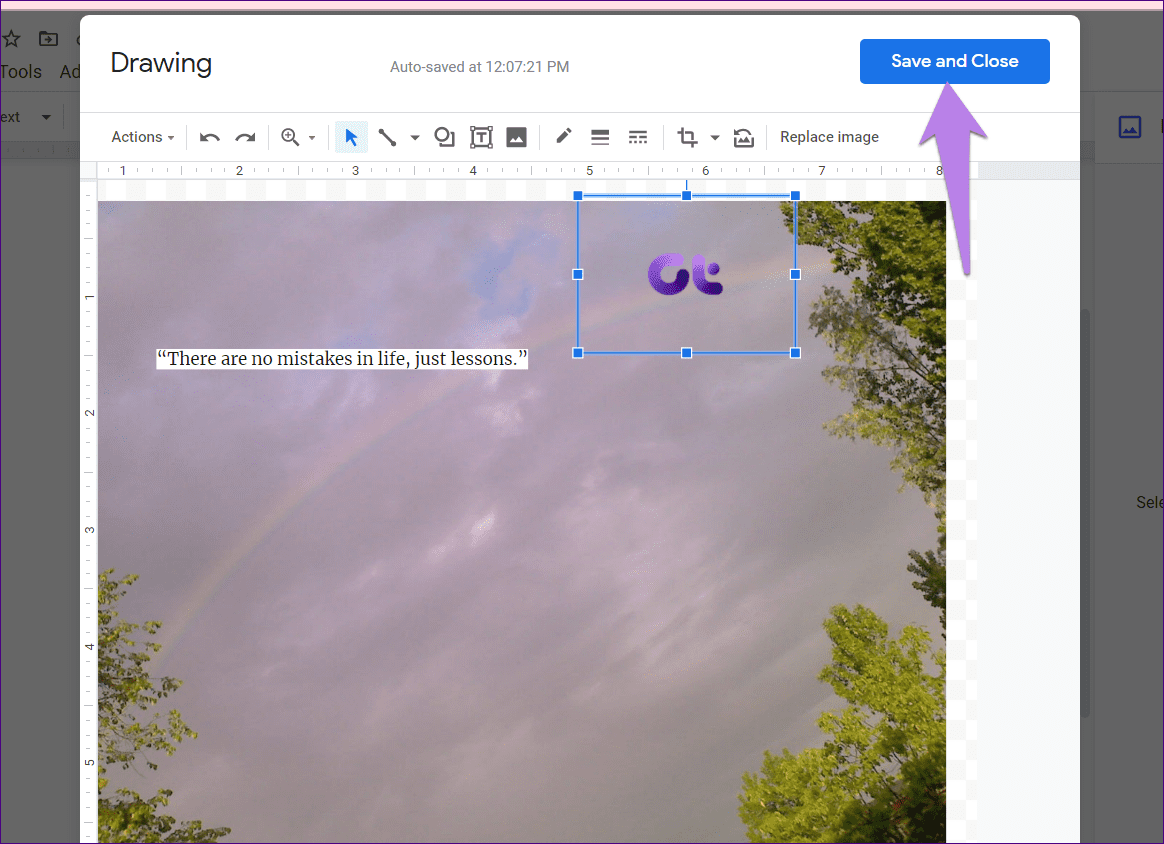
Step 4: When the prototype has been inserted in the Drawing panel, yous can now add together text or another image on elevation of it. To add text, click on the text icon. So showtime typing on the image. Customize the font colour, fashion, etc., from the options at the pinnacle. Click on Salvage and Shut at the top to insert this picture into your document.
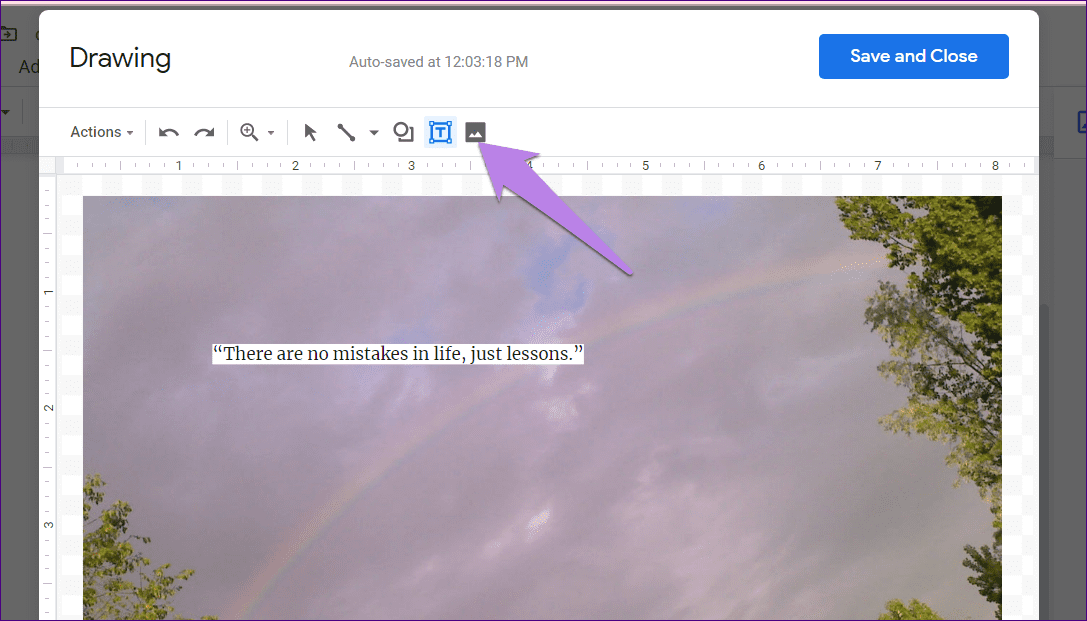
Similarly, to add another image, click on the aforementioned Image icon that you used in footstep iii. Open the image that you want to add on top.
It volition appear higher up your groundwork image. Using the mouse, drag it to the required position, or change its size from its corners. Click on Save and Close to add the modified image with your logo or layered image in the document.
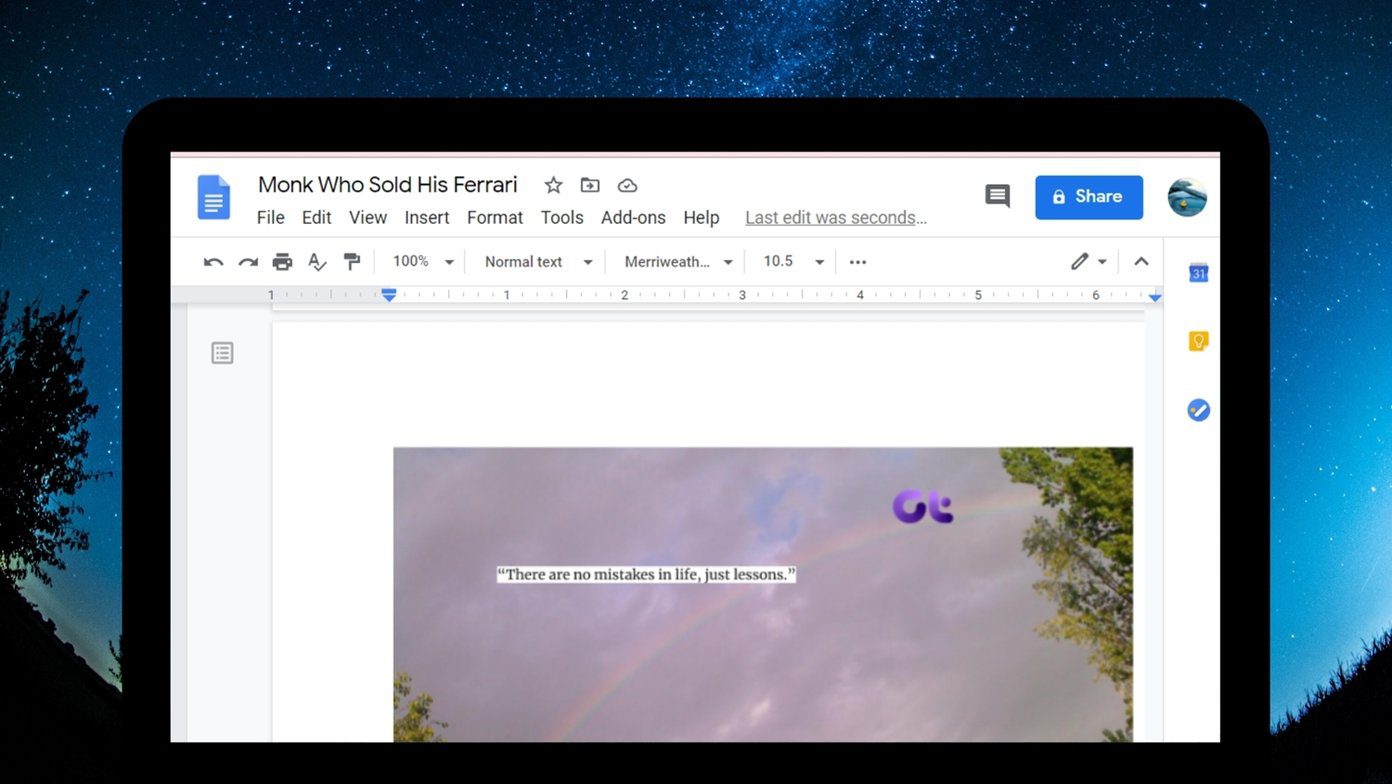
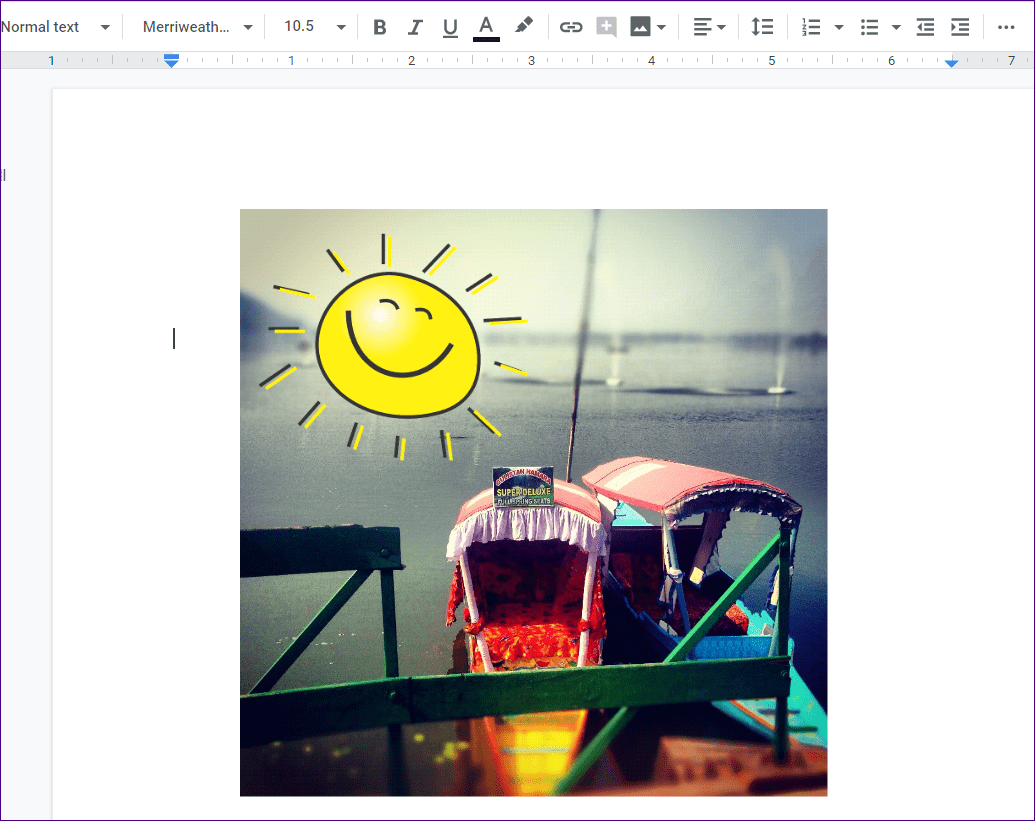
Here's the final result.
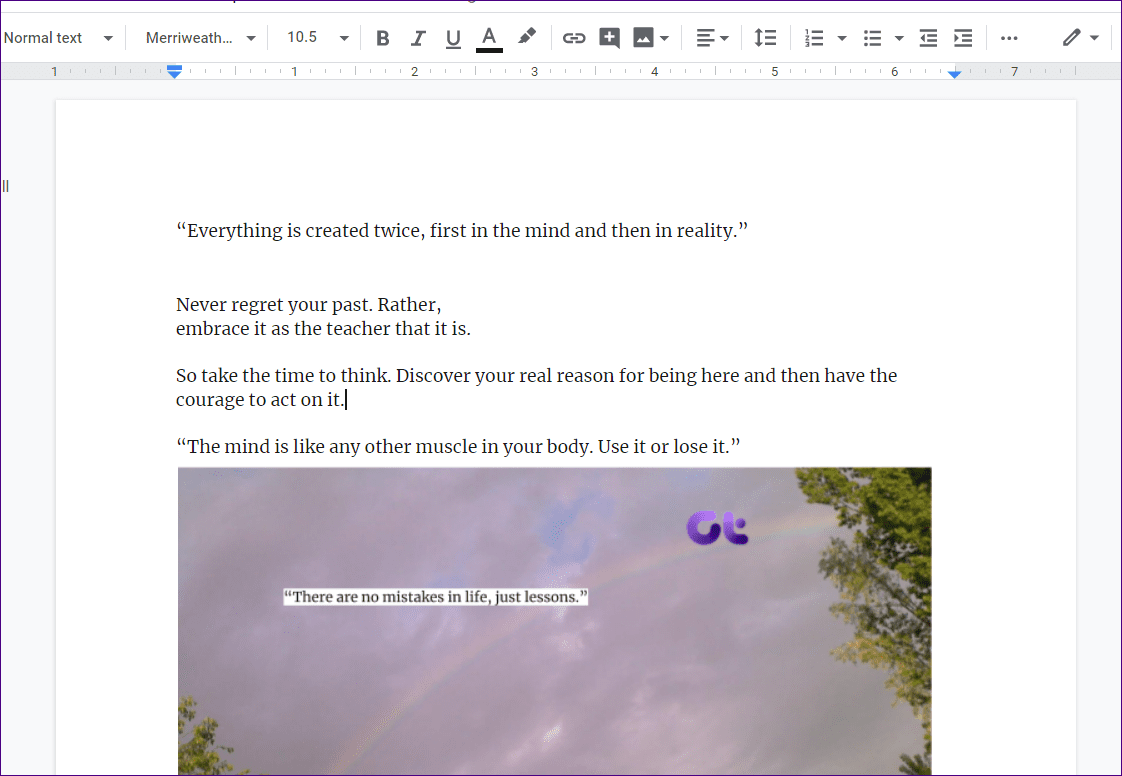
If you desire to edit any element of this paradigm later, just double-click on the image in Google Docs. You will be taken to the Drawing panel from where you can edit existing elements or add together more of them.
Method two: Layer Images Using Wrap Text in Google Docs
The 2d method makes layering possible in Google Docs by keeping margin equally 0 in the Wrap text feature. Here are the steps to achieve the same.
Step 1: Open up your Google Docs document.
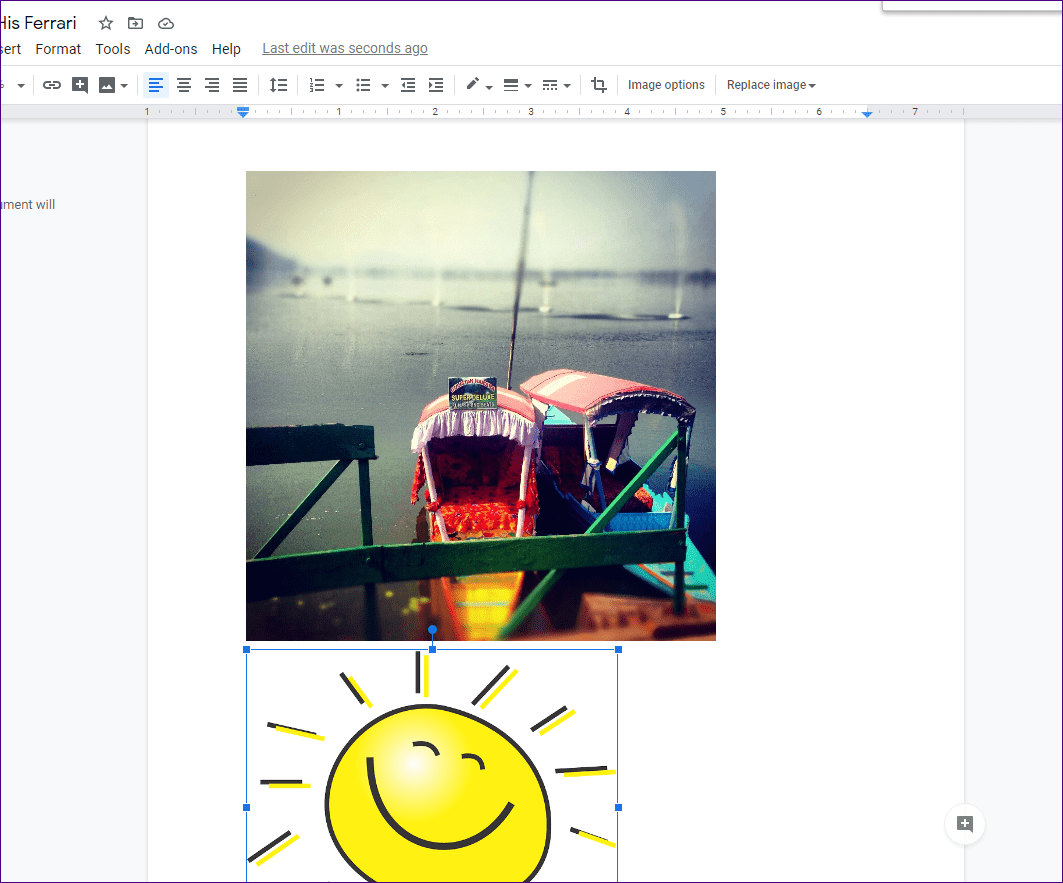
Step ii: Click on Insert at the top and go to Prototype. Add your image. It can be any image – background or foreground.
Step 3: Repeat step ii and add the second photo in your document. Hither'due south how the two pictures would look in Google Docs.
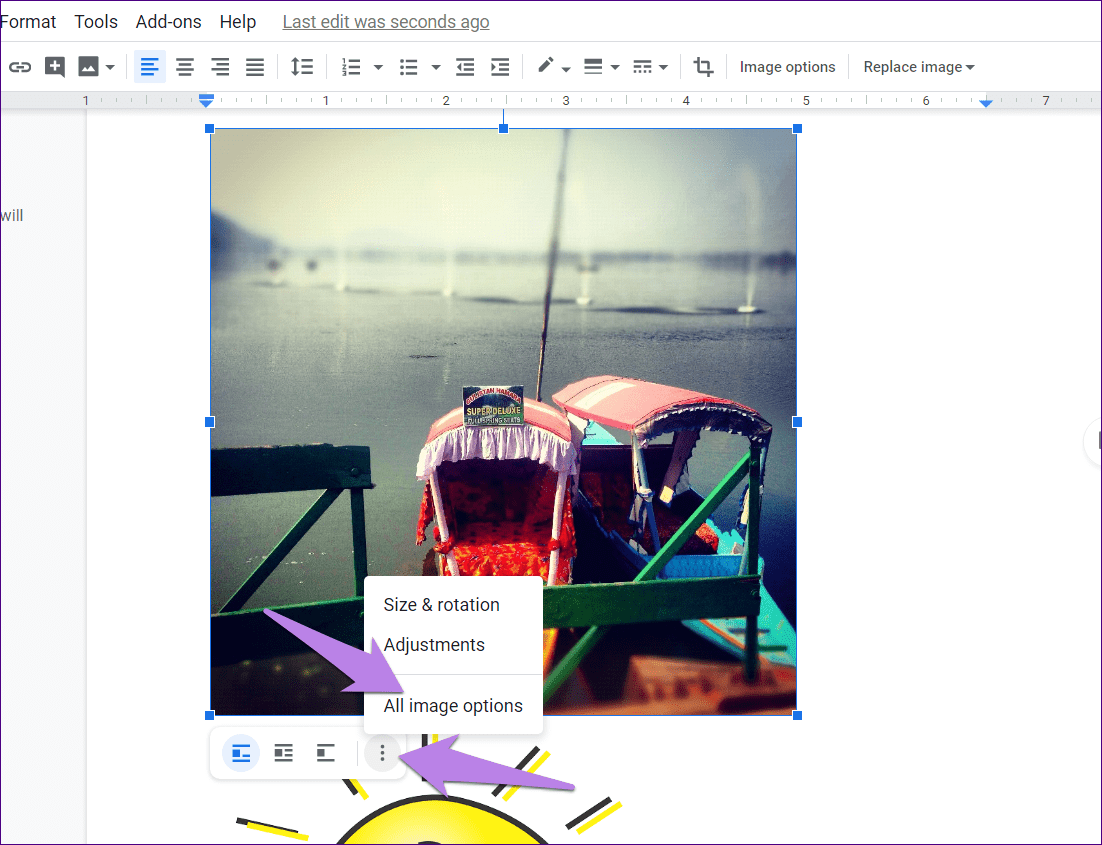
Stride 4: Click on the start prototype to select it. A toolbar volition appear. Click on the three-dot icon and choose All paradigm options.
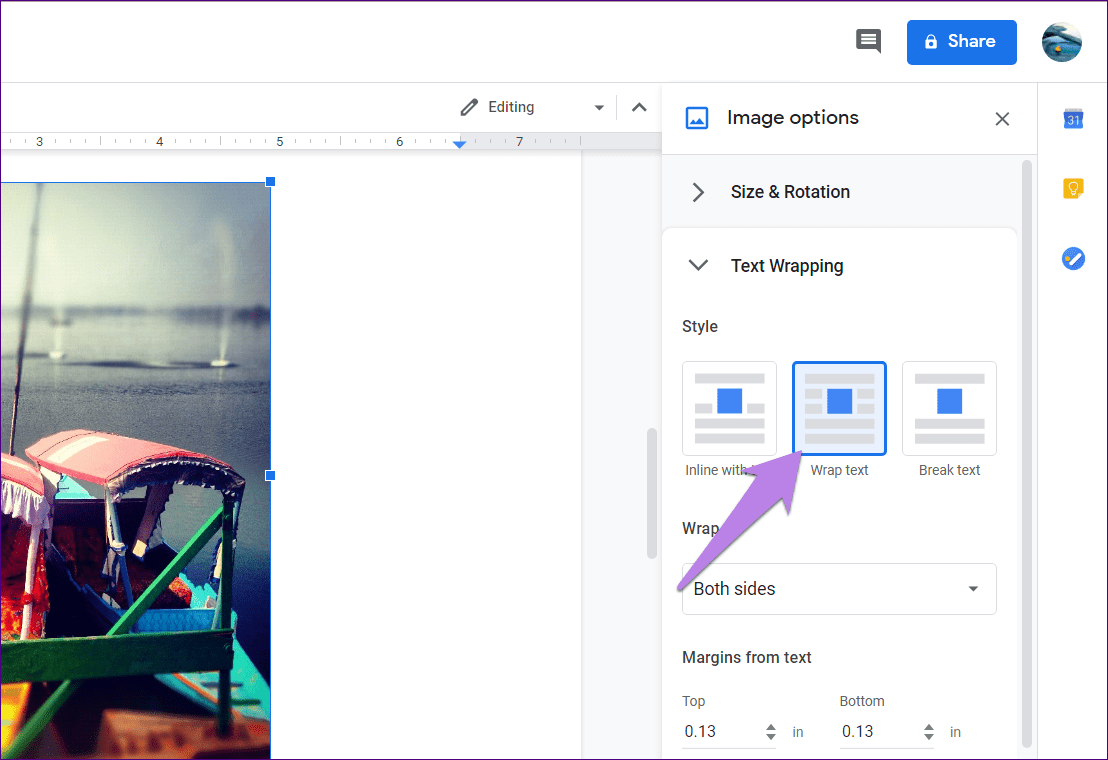
Step 5: The Image options panel will open up on the right side. Go to the Text Wrapping section. Select Wrap text option.
Step 6: Yous will discover that new options announced in the toolbar beneath your photo. Click on the margin driblet-down box and choose 0.
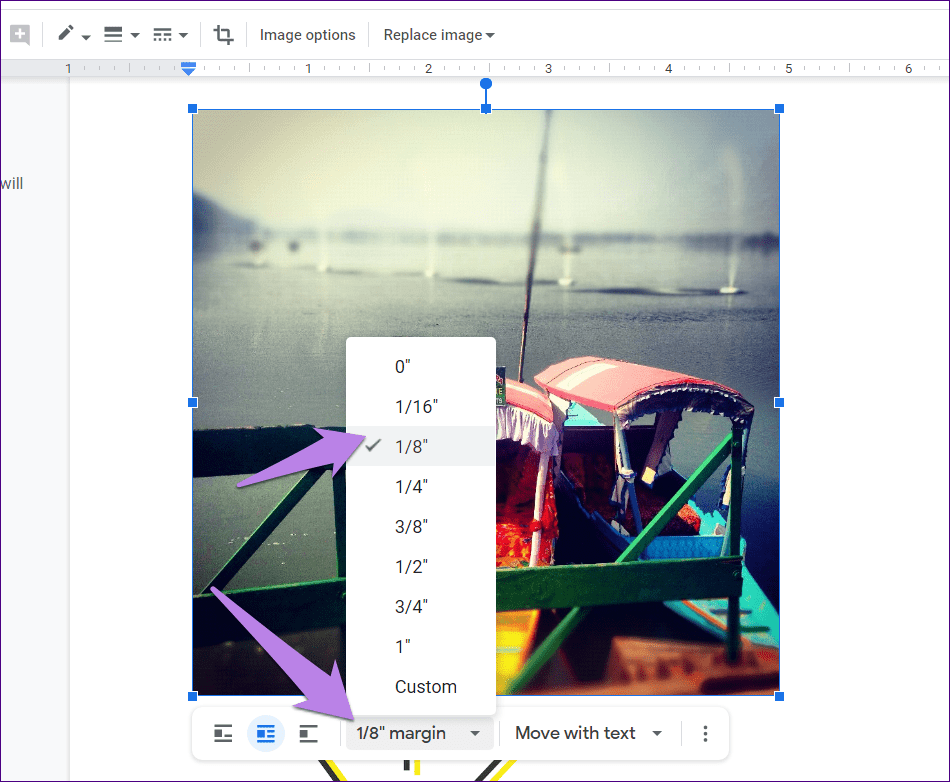
Pro Tip: You can skip pace 5 by clicking on the 2nd icon in the toolbar that appears when yous click on the epitome. That volition actuate the Wrap text feature. And so change the margin value.
Footstep 7: Repeat steps 5-seven for the second image equally well.
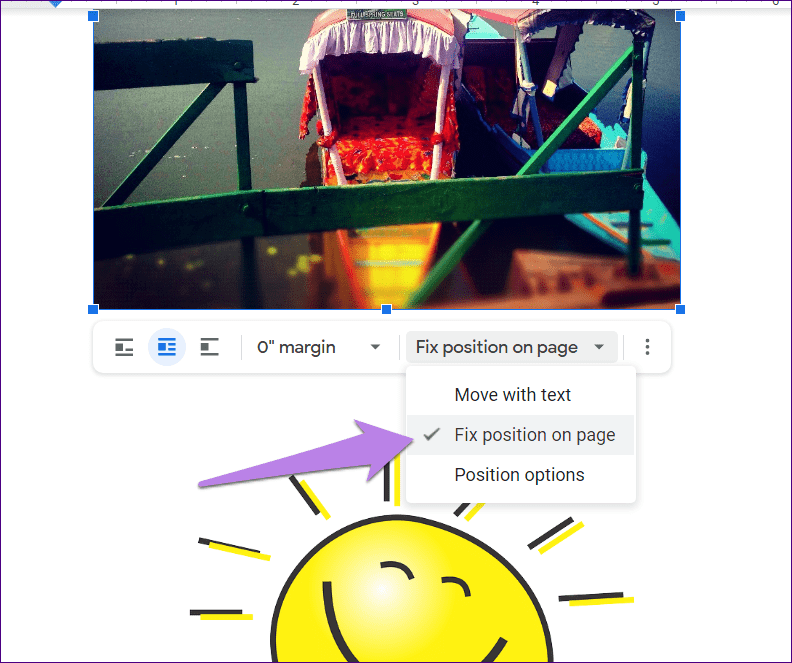
If the text appears to move with the image when you perform these steps, select 'Fix position on folio' from the same image toolbar where you inverse the margin for both the images.
Step 8: Now elevate the 2nd epitome on top of the showtime epitome. Voila! You have successfully overlapped images in Google Docs without using whatever photo editor.
Bonus Tips to Overlay Images in Google Docs
The following tips will come handy while using the second method of layering images.
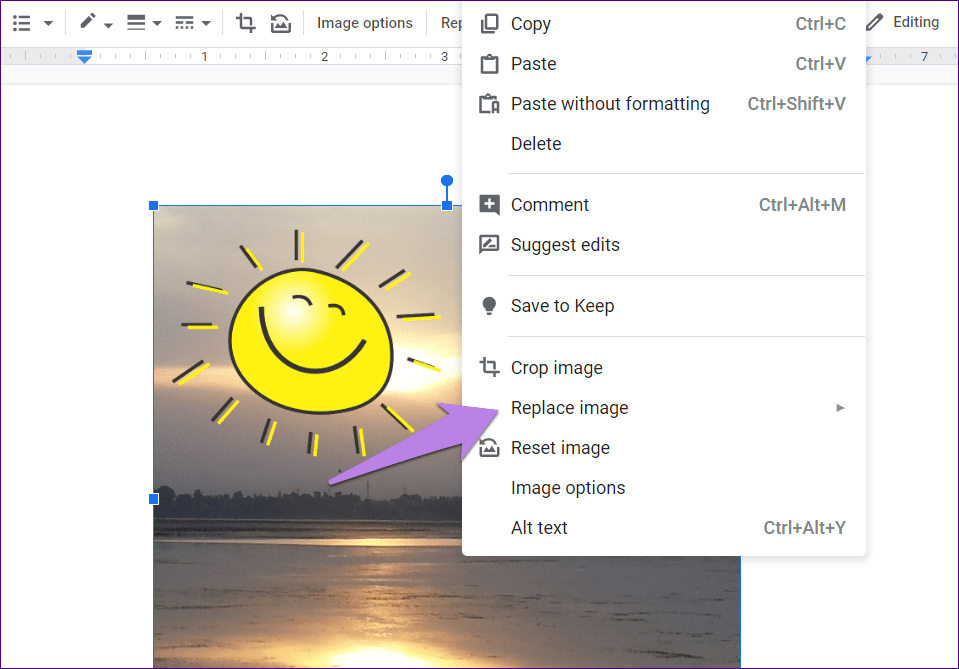
1. Modify Images
At whatever point, if you feel that you have added wrong images, yous don't demand to repeat all the steps. Only, right-click on the image that you desire to change and striking the Replace Image choice.
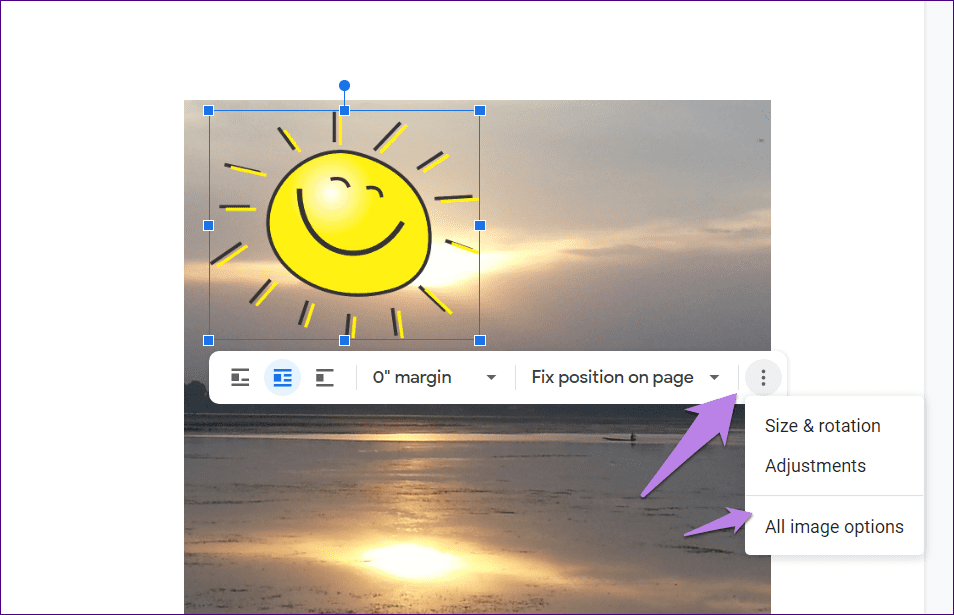
ii. Change Transparency of Watermark
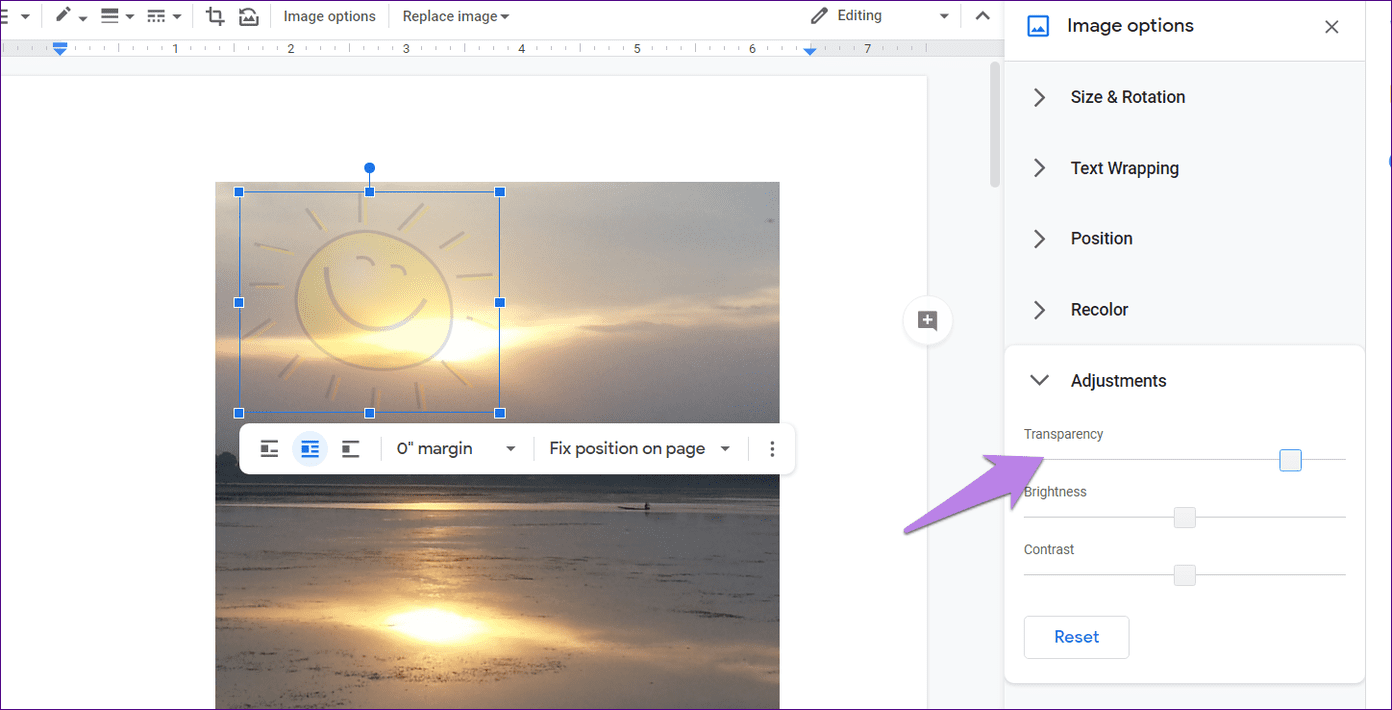
If you lot are calculation a logo or a watermark to an image using method ii, you can control its transparency. For that, click on the image and striking the three-dot icon from the toolbar. Select All paradigm options.
Go to Adjustments from the right panel. Adjust the slider under Transparency.
Google Docs Is Enough
With unproblematic methods, we accept managed to add images and text over another image in Google Docs. That eliminates the fuss of having a full-fledged photograph editor to overlap images. Of course, their importance cannot be negated. You will have to rely on them if you want to edit images in bulk.
Side by side upwardly: Discover the hidden secrets of Google Docs with the tips and tricks mentioned in our adjacent post.
Source: https://www.guidingtech.com/put-image-text-top-of-other-image-in-google-docs/
Enviar um comentário for "How to Overlay Word Art on Top of Typing Google Doc"